
Turn drone photos into maps and 3D models.
A step-by-step guide to importing a Google Drive ZIP, processing photogrammetry data, and viewing your outputs in Layers.
Explore drone photogrammetry and orthomosaic mapping with DroneCollab, then configure your processing job using this guide.
Sample UAV Photos (ZIP) on Google Drive
Open the sample ZIP on Google Drive, then use its shared link to import it through Photos.
8 steps from photos to final layers
Click screenshots to enlarge
Import the demo ZIP from Google Drive
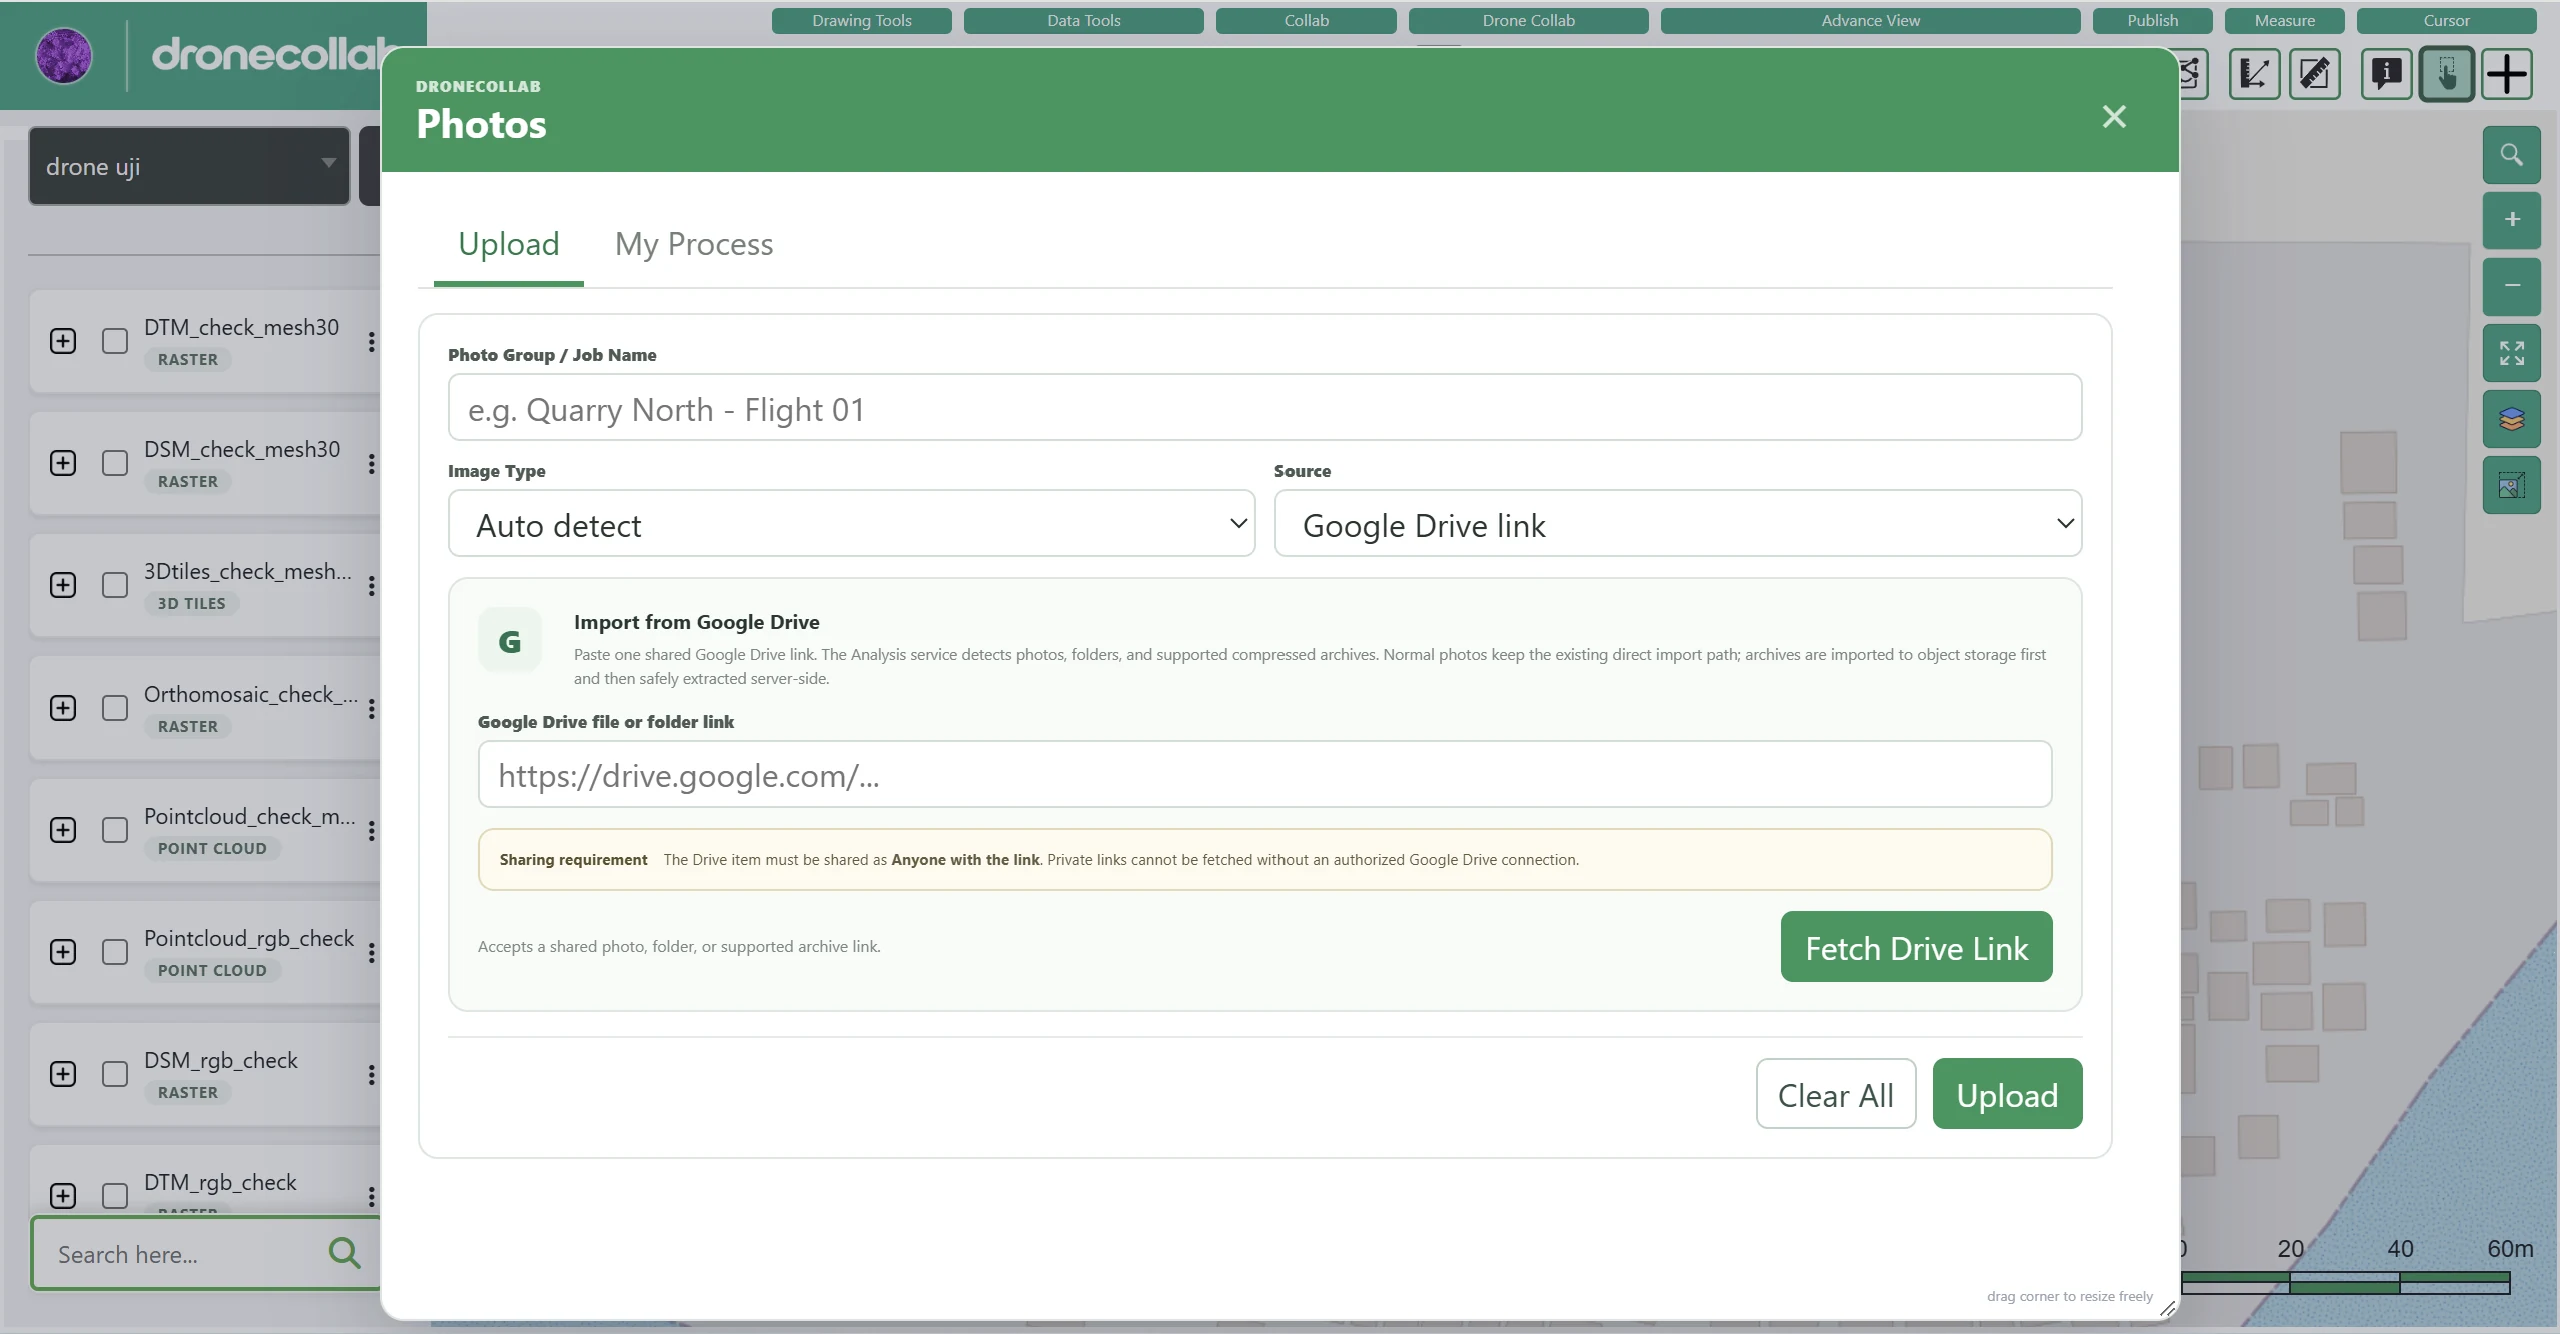
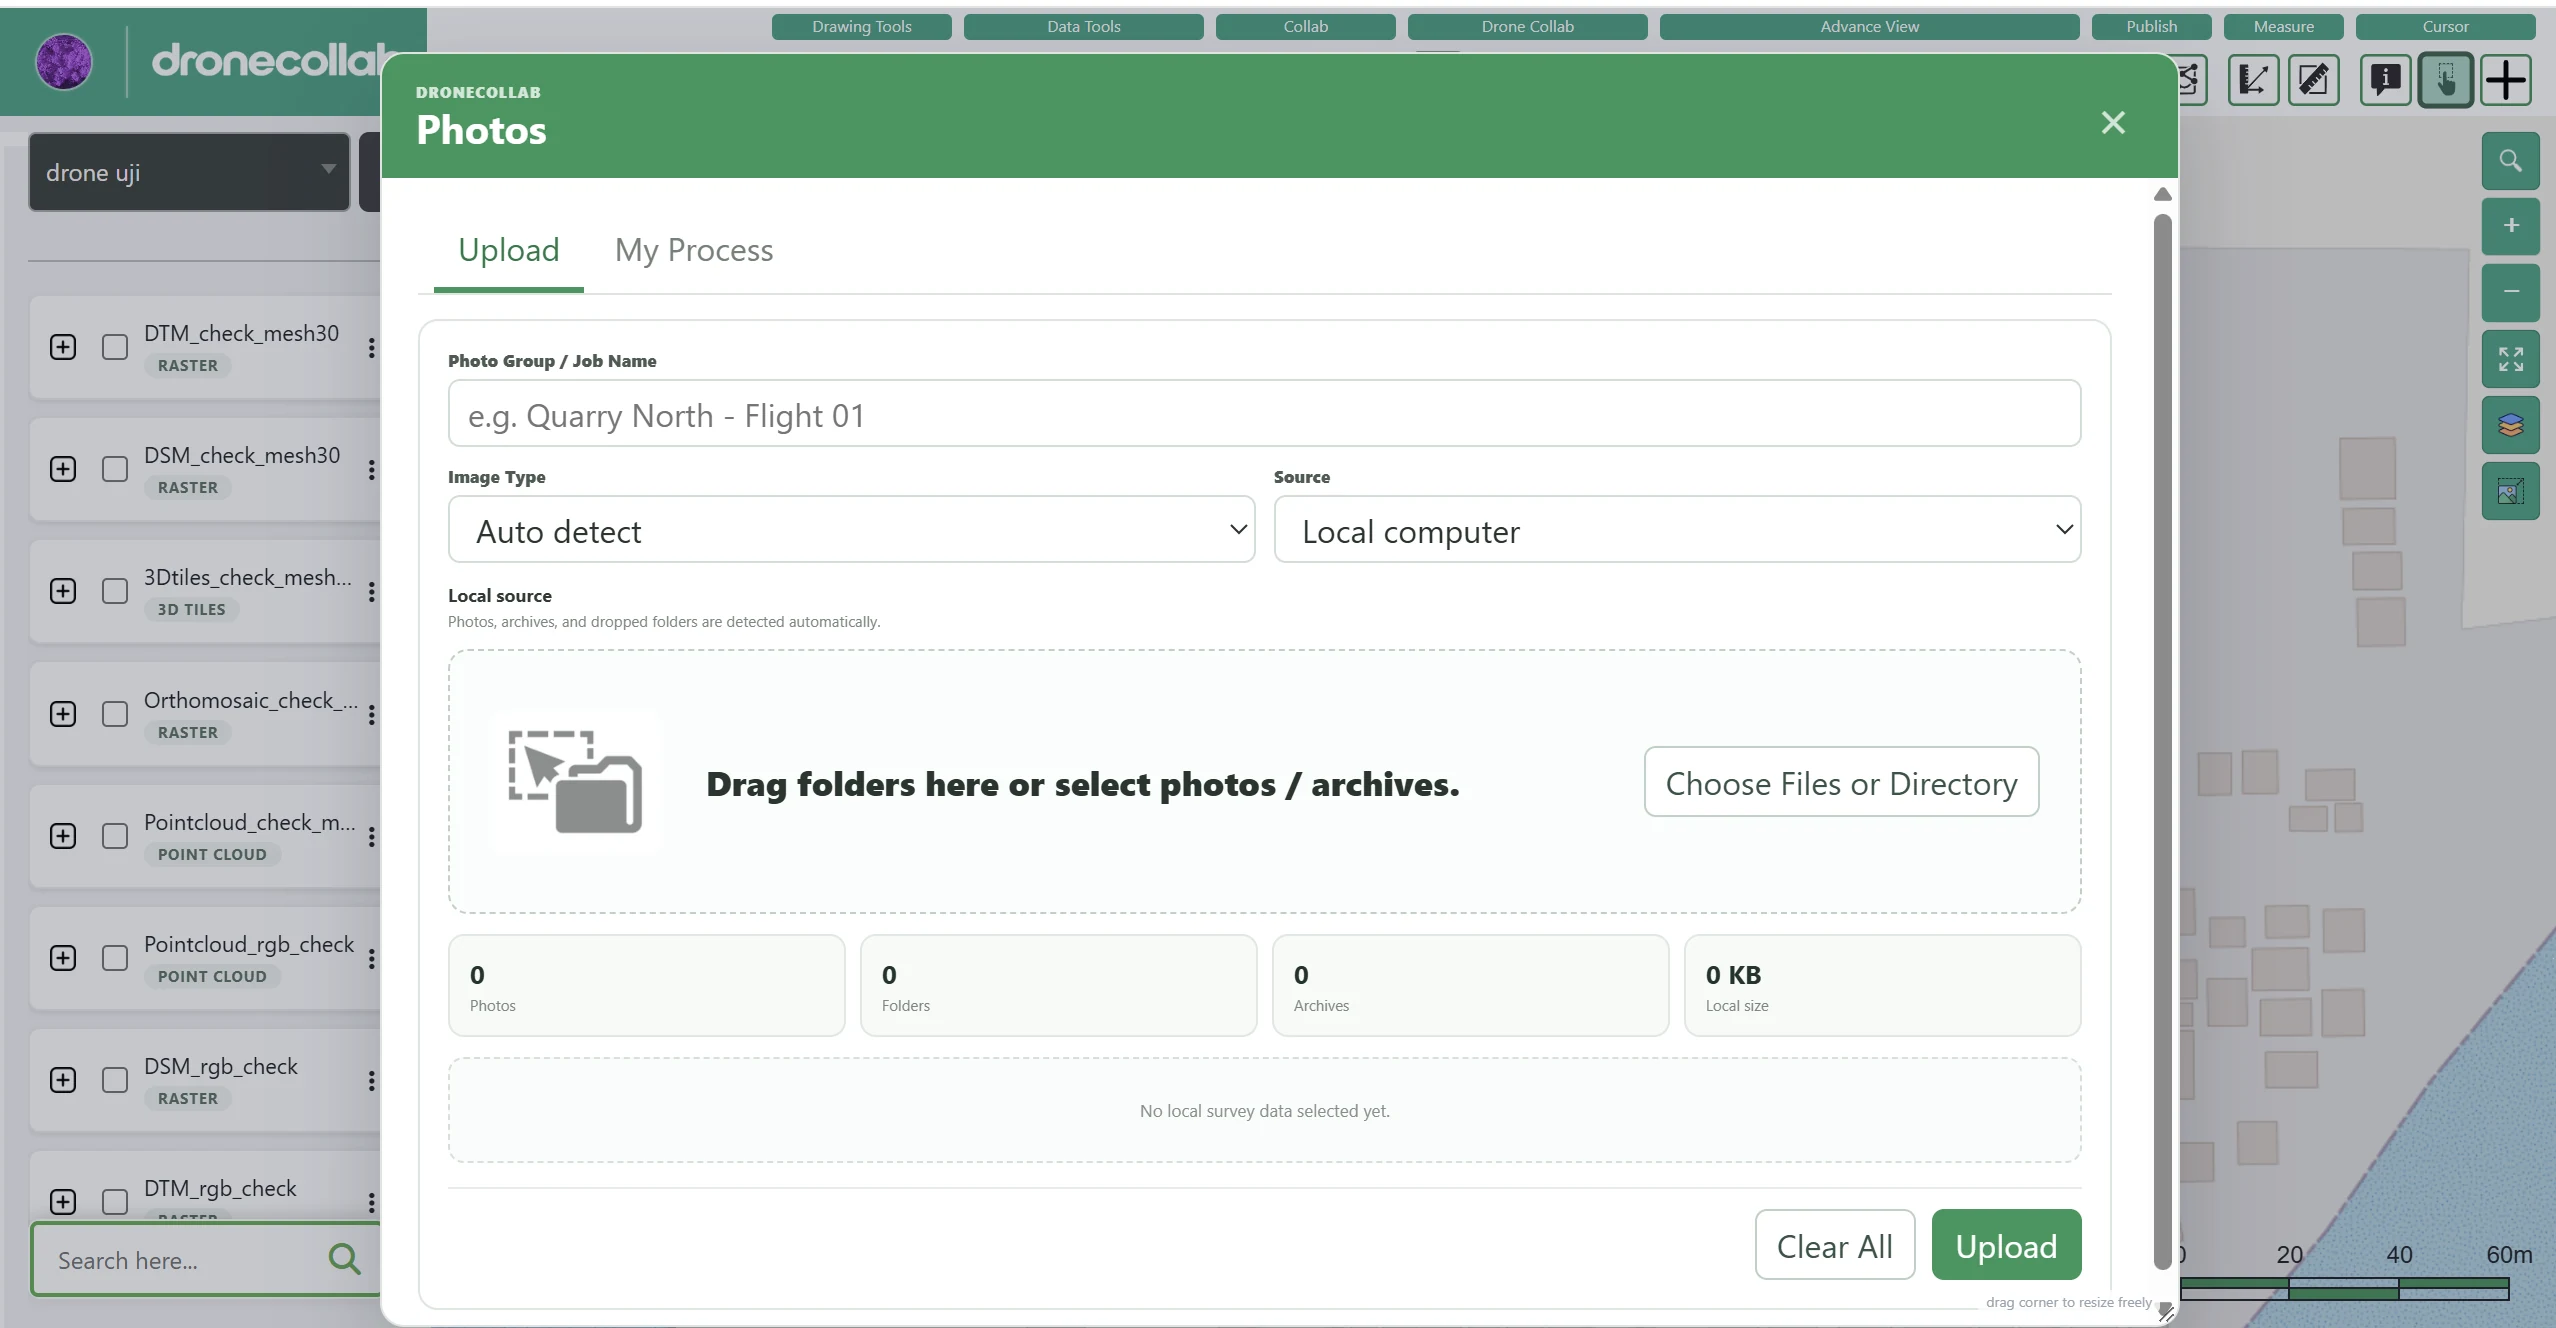
Open Photos from the Drone Collab toolbar and choose the Upload tab. You can import the sample dataset from a Google Drive link.
What to do
- Enter a Photo Group / Job Name to identify the dataset.
- Choose Source: Google Drive link, paste the shared demo ZIP URL, and click Fetch Drive Link. Set Google Drive sharing to Anyone with the link.
- After the source is recognized, click Upload. Alternatively, choose Local computer to upload images, folders, or archives from your device.
Application screenshot
Confirm the photos are ready
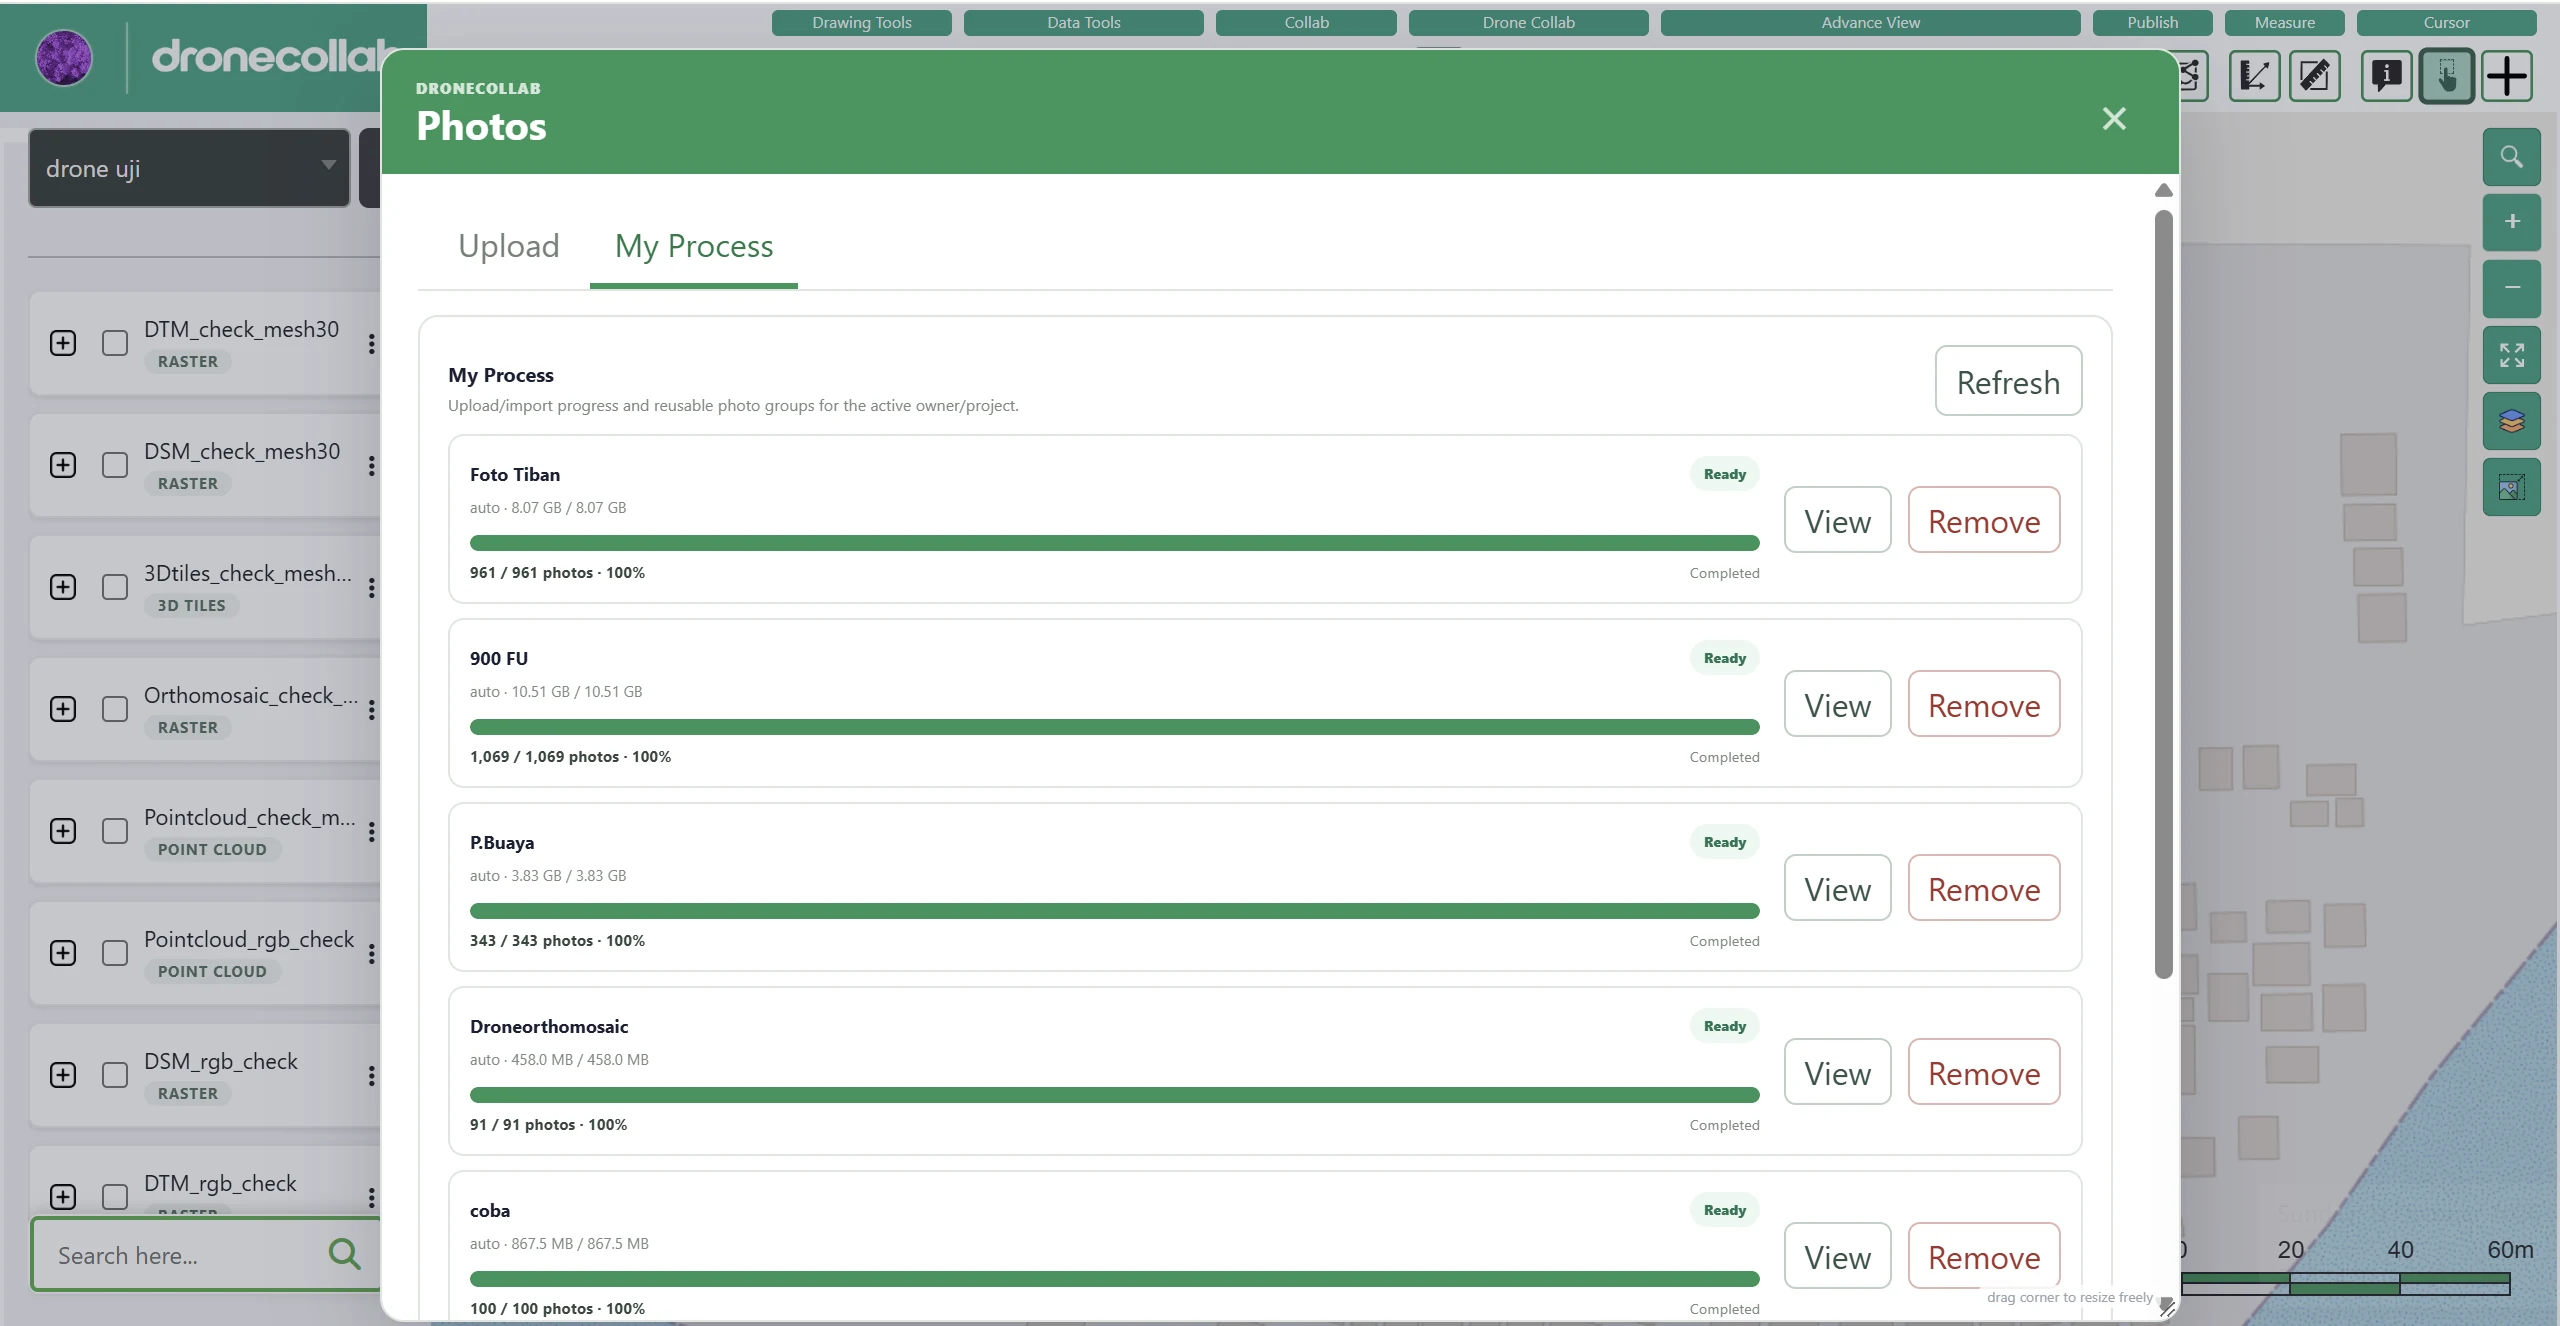
In the Photos window, open My Process to check photo uploads and imports.
What to do
- Wait for the upload to finish and the photo group status to show Ready.
- Select Refresh if the status needs updating.
- Use View to inspect the photo group before processing.
Application screenshot
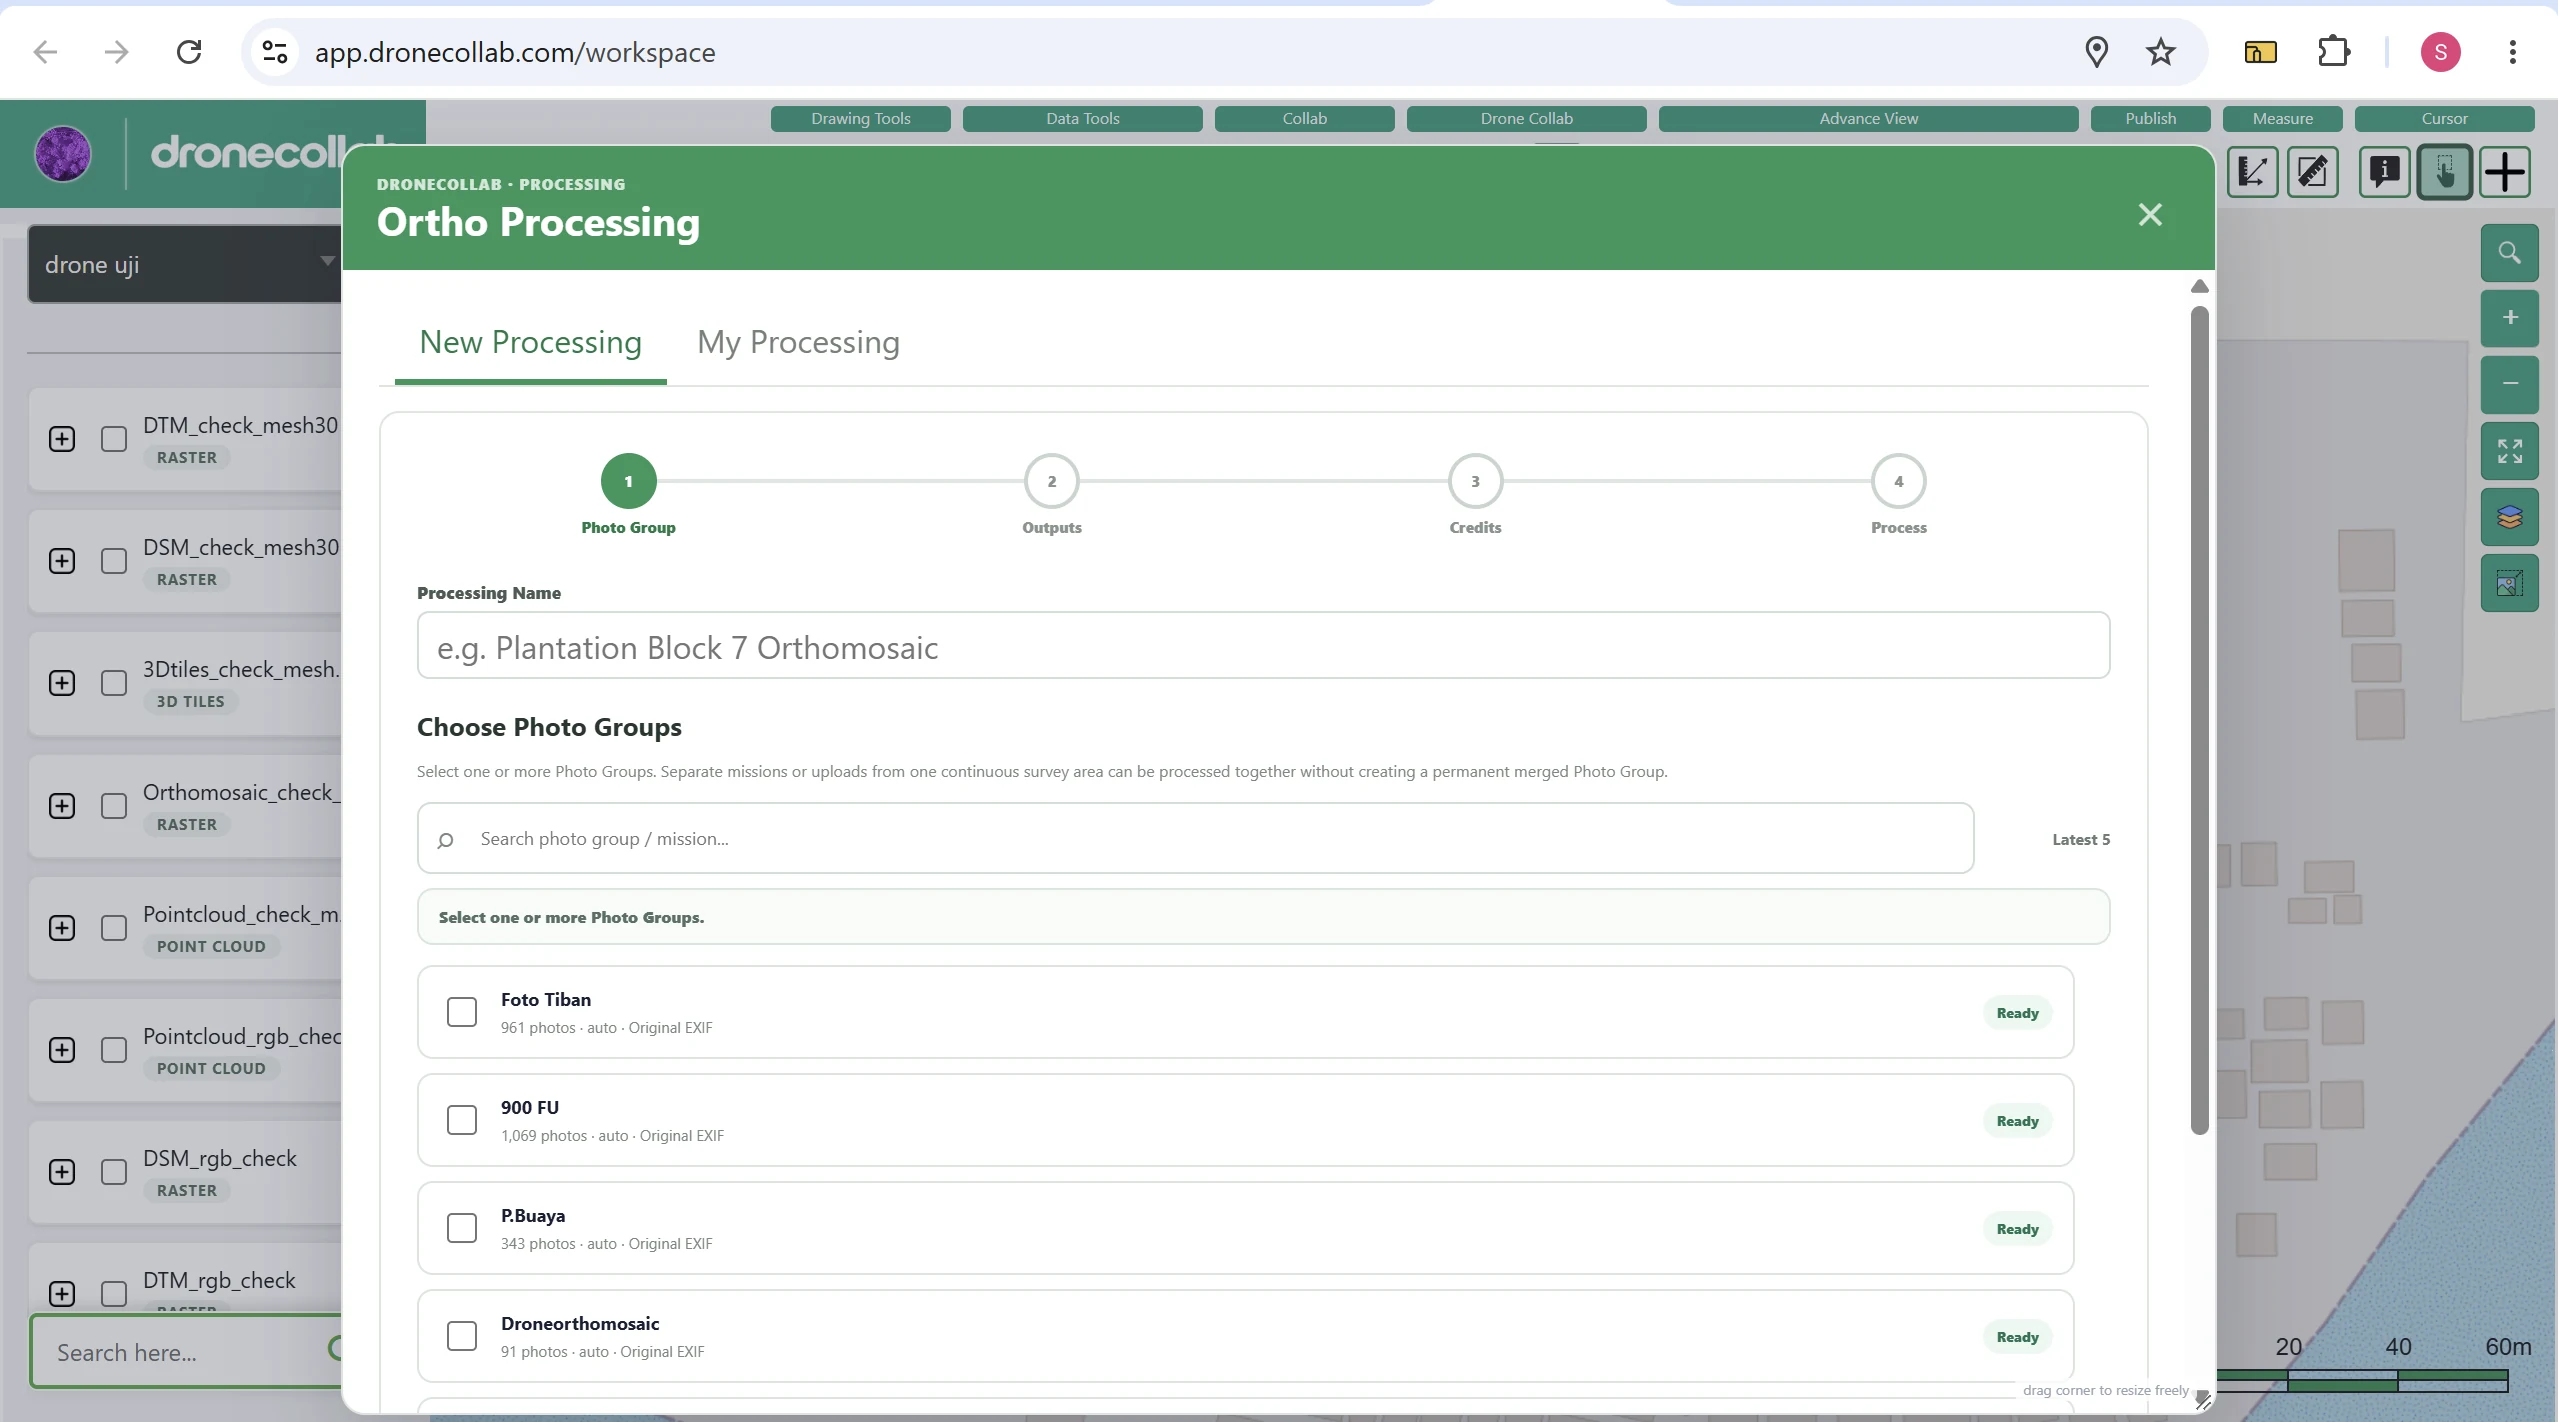
Start Ortho Processing
Click the four-square Ortho Processing icon in the Drone Collab toolbar, then open New Processing.
What to do
- Enter a Processing Name, such as Demo UAV — Orthomosaic.
- Under Choose Photo Groups, select the group marked Ready.
- Combine groups only when they belong to a compatible survey.
Application screenshot
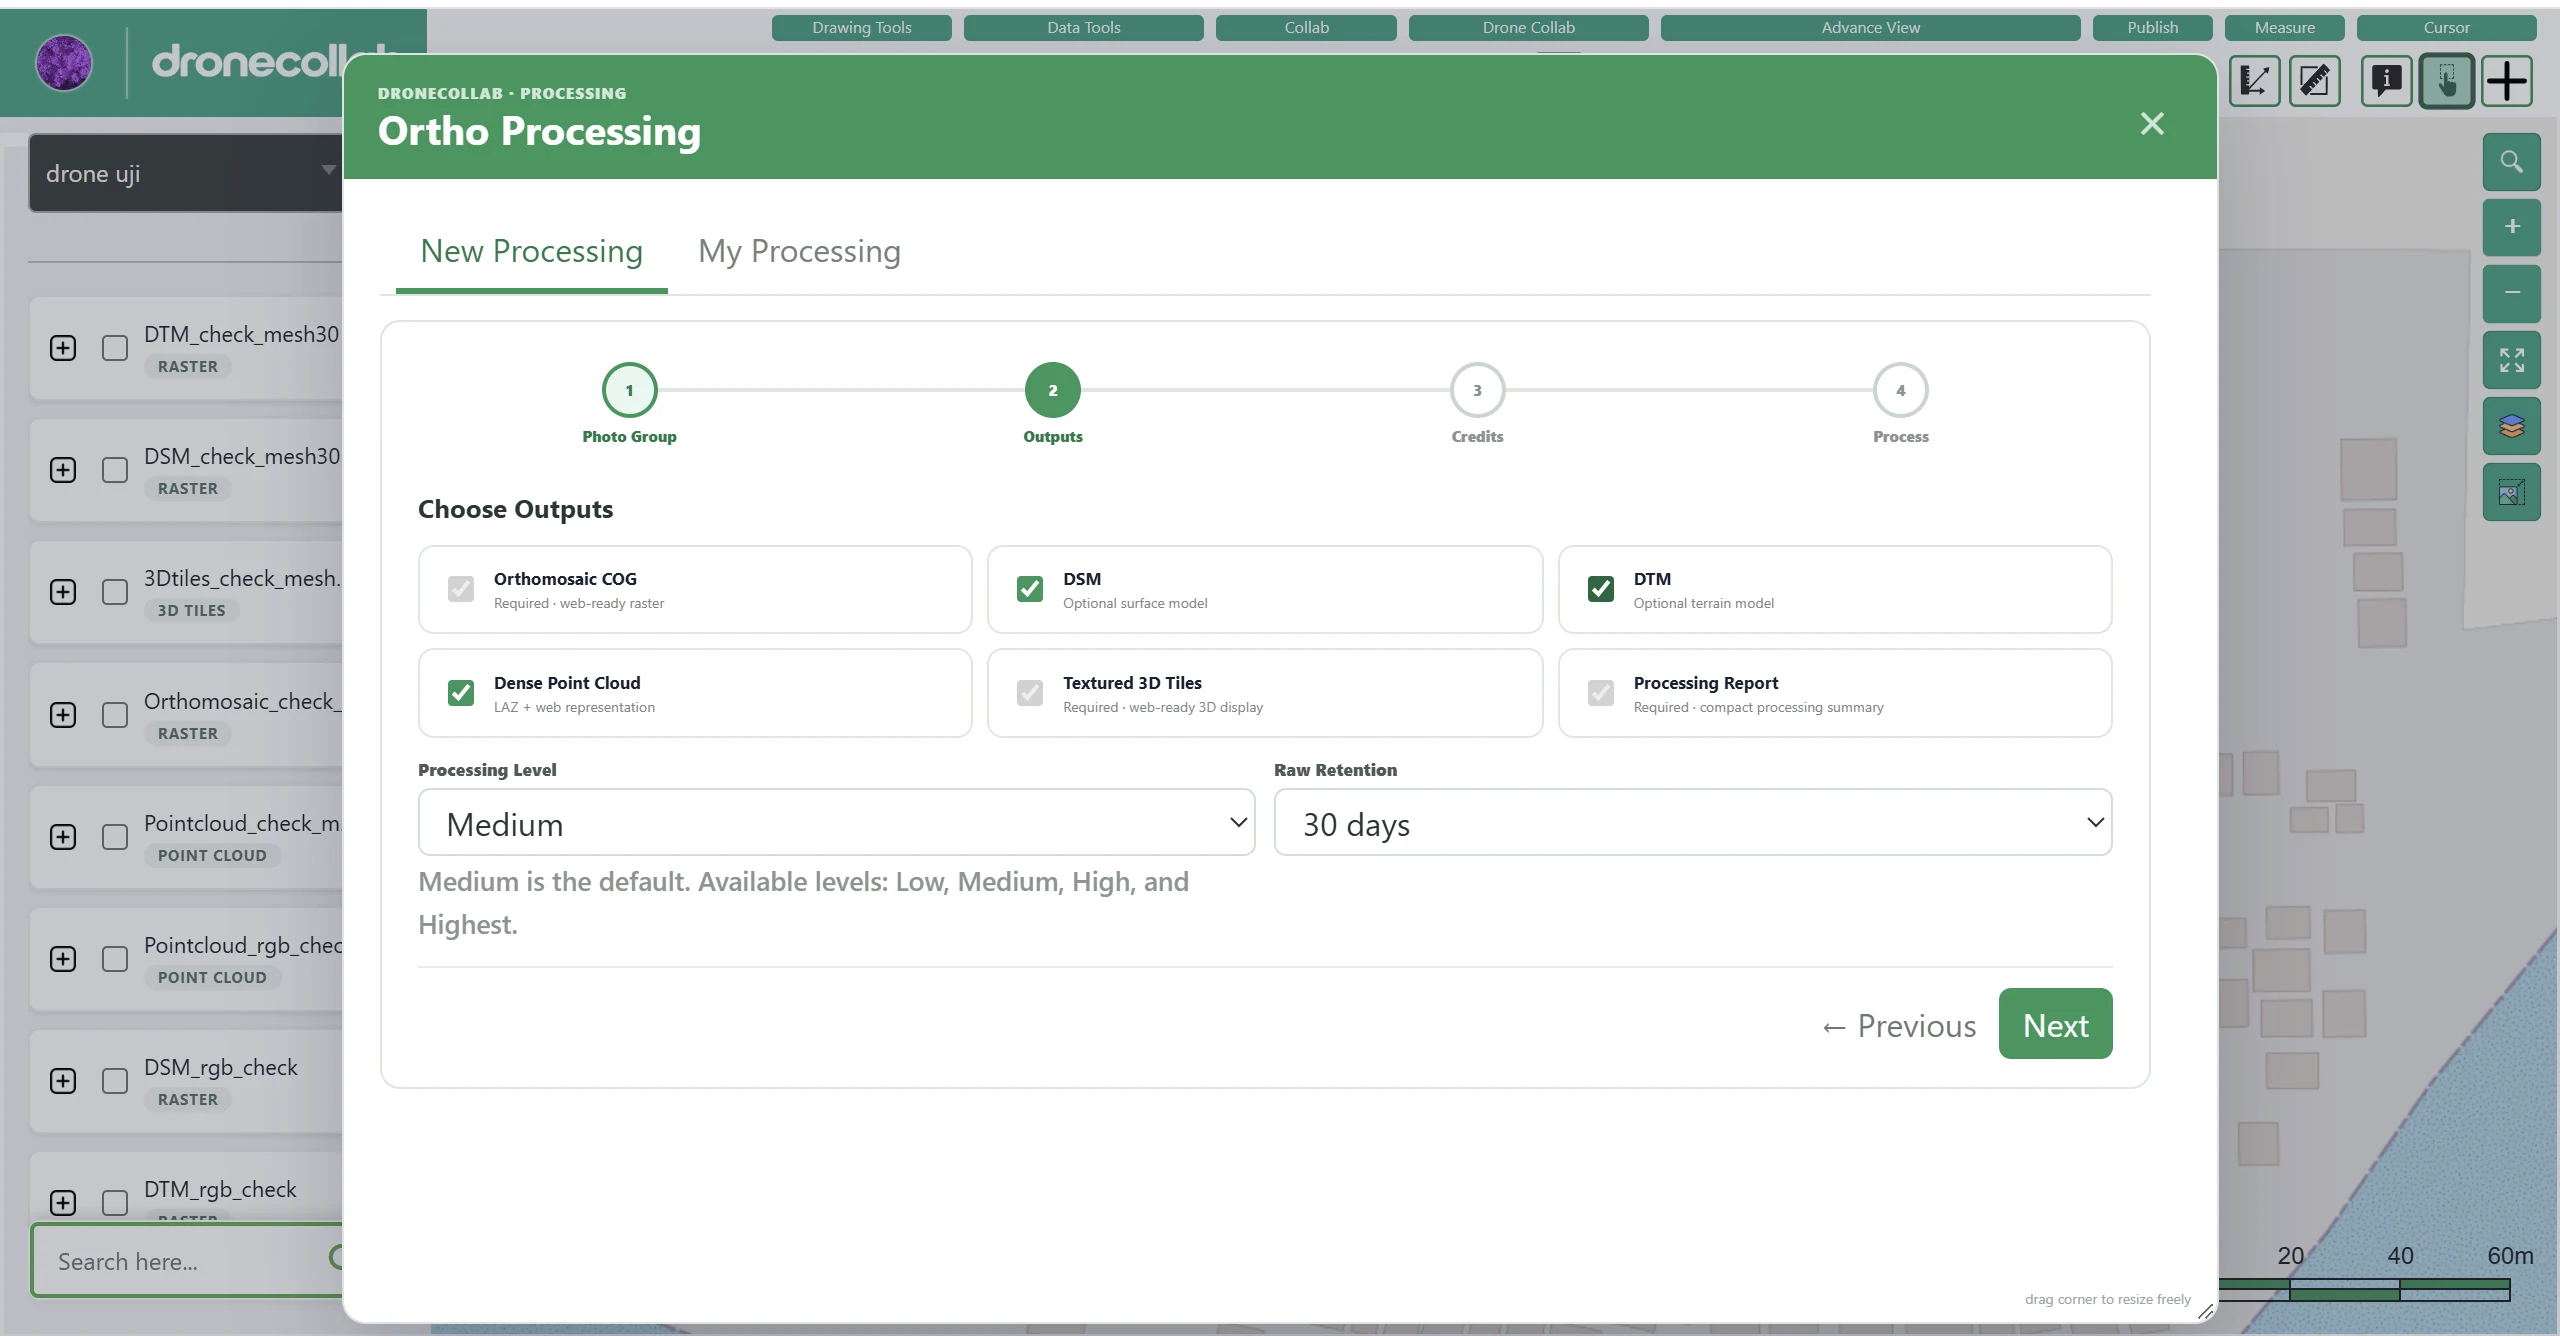
Choose outputs and quality
On the Outputs stage, select the deliverables you need. Certain outputs may be required, unavailable, or package-dependent.
What to do
- Possible outputs include Orthomosaic COG, DSM, DTM, Dense Point Cloud, Textured 3D Tiles, and Processing Report where available.
- Choose Processing Level: Low, Medium, High, or Highest. The example screenshot uses Medium.
- Choose Raw Retention and click Next.
Application screenshot
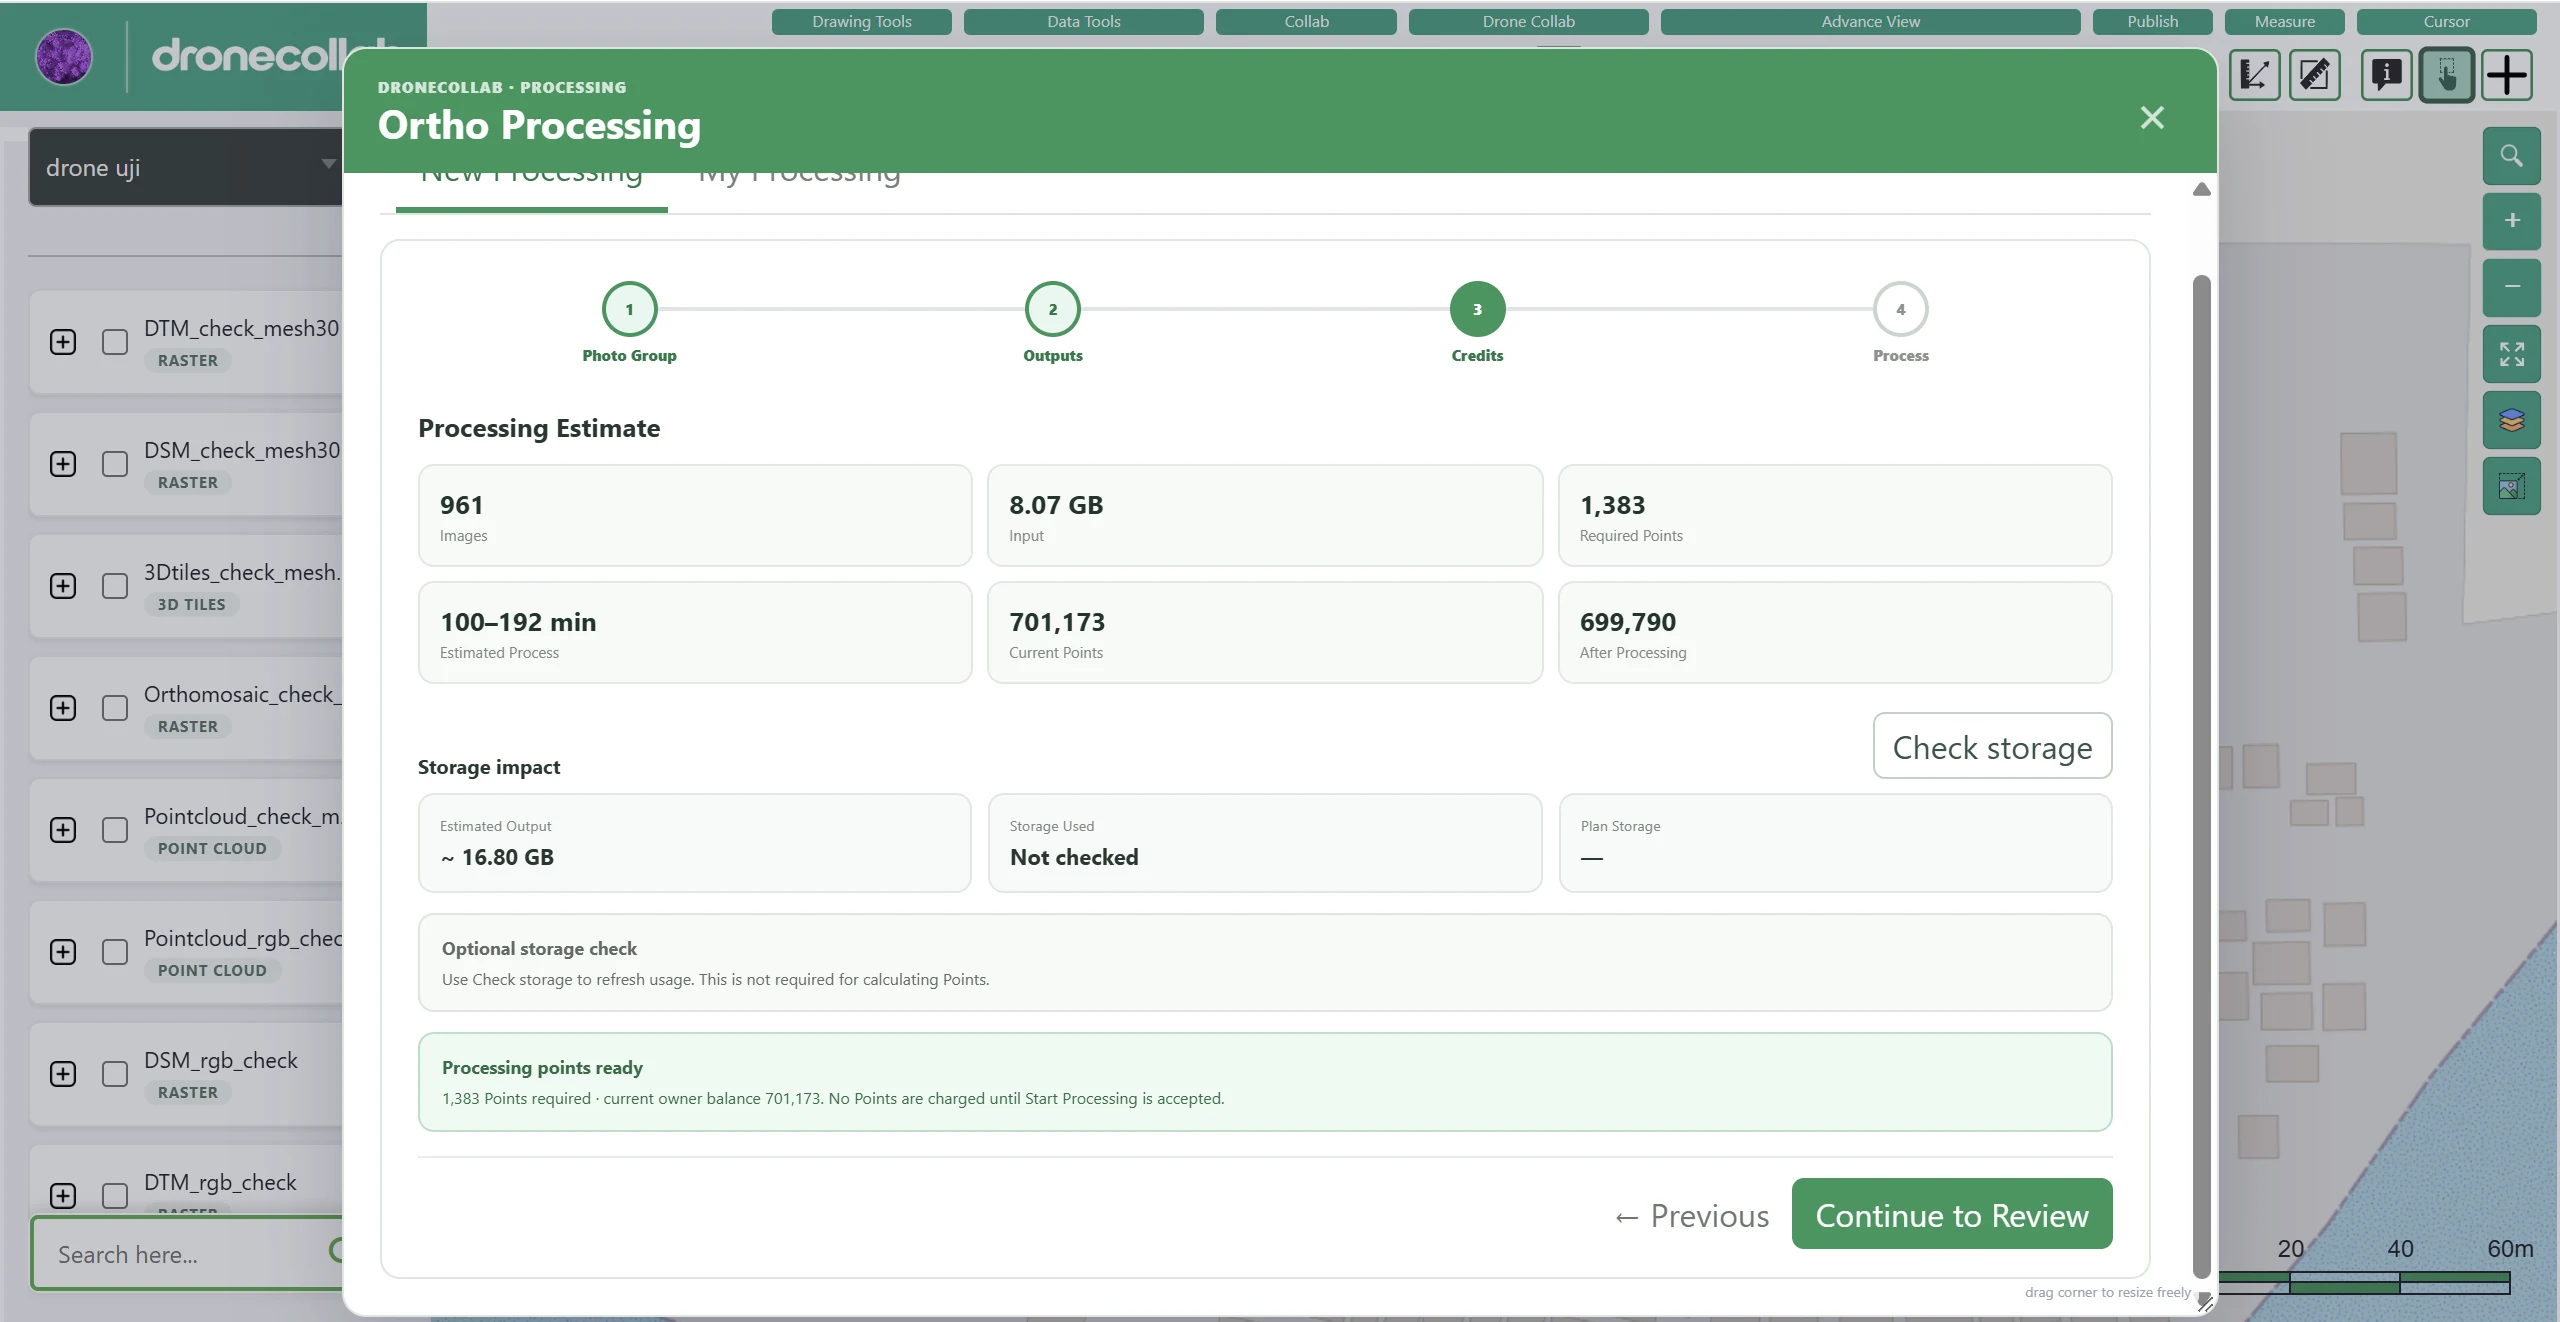
Check processing points
The Credits stage estimates photo count, input size, processing time, required points, and storage.
What to do
- Compare Required Points against Current Points and the remaining balance.
- Use Check storage to refresh storage information if needed; it is optional in the example.
- Click Continue to Review when the estimate and balance are acceptable.
Application screenshot
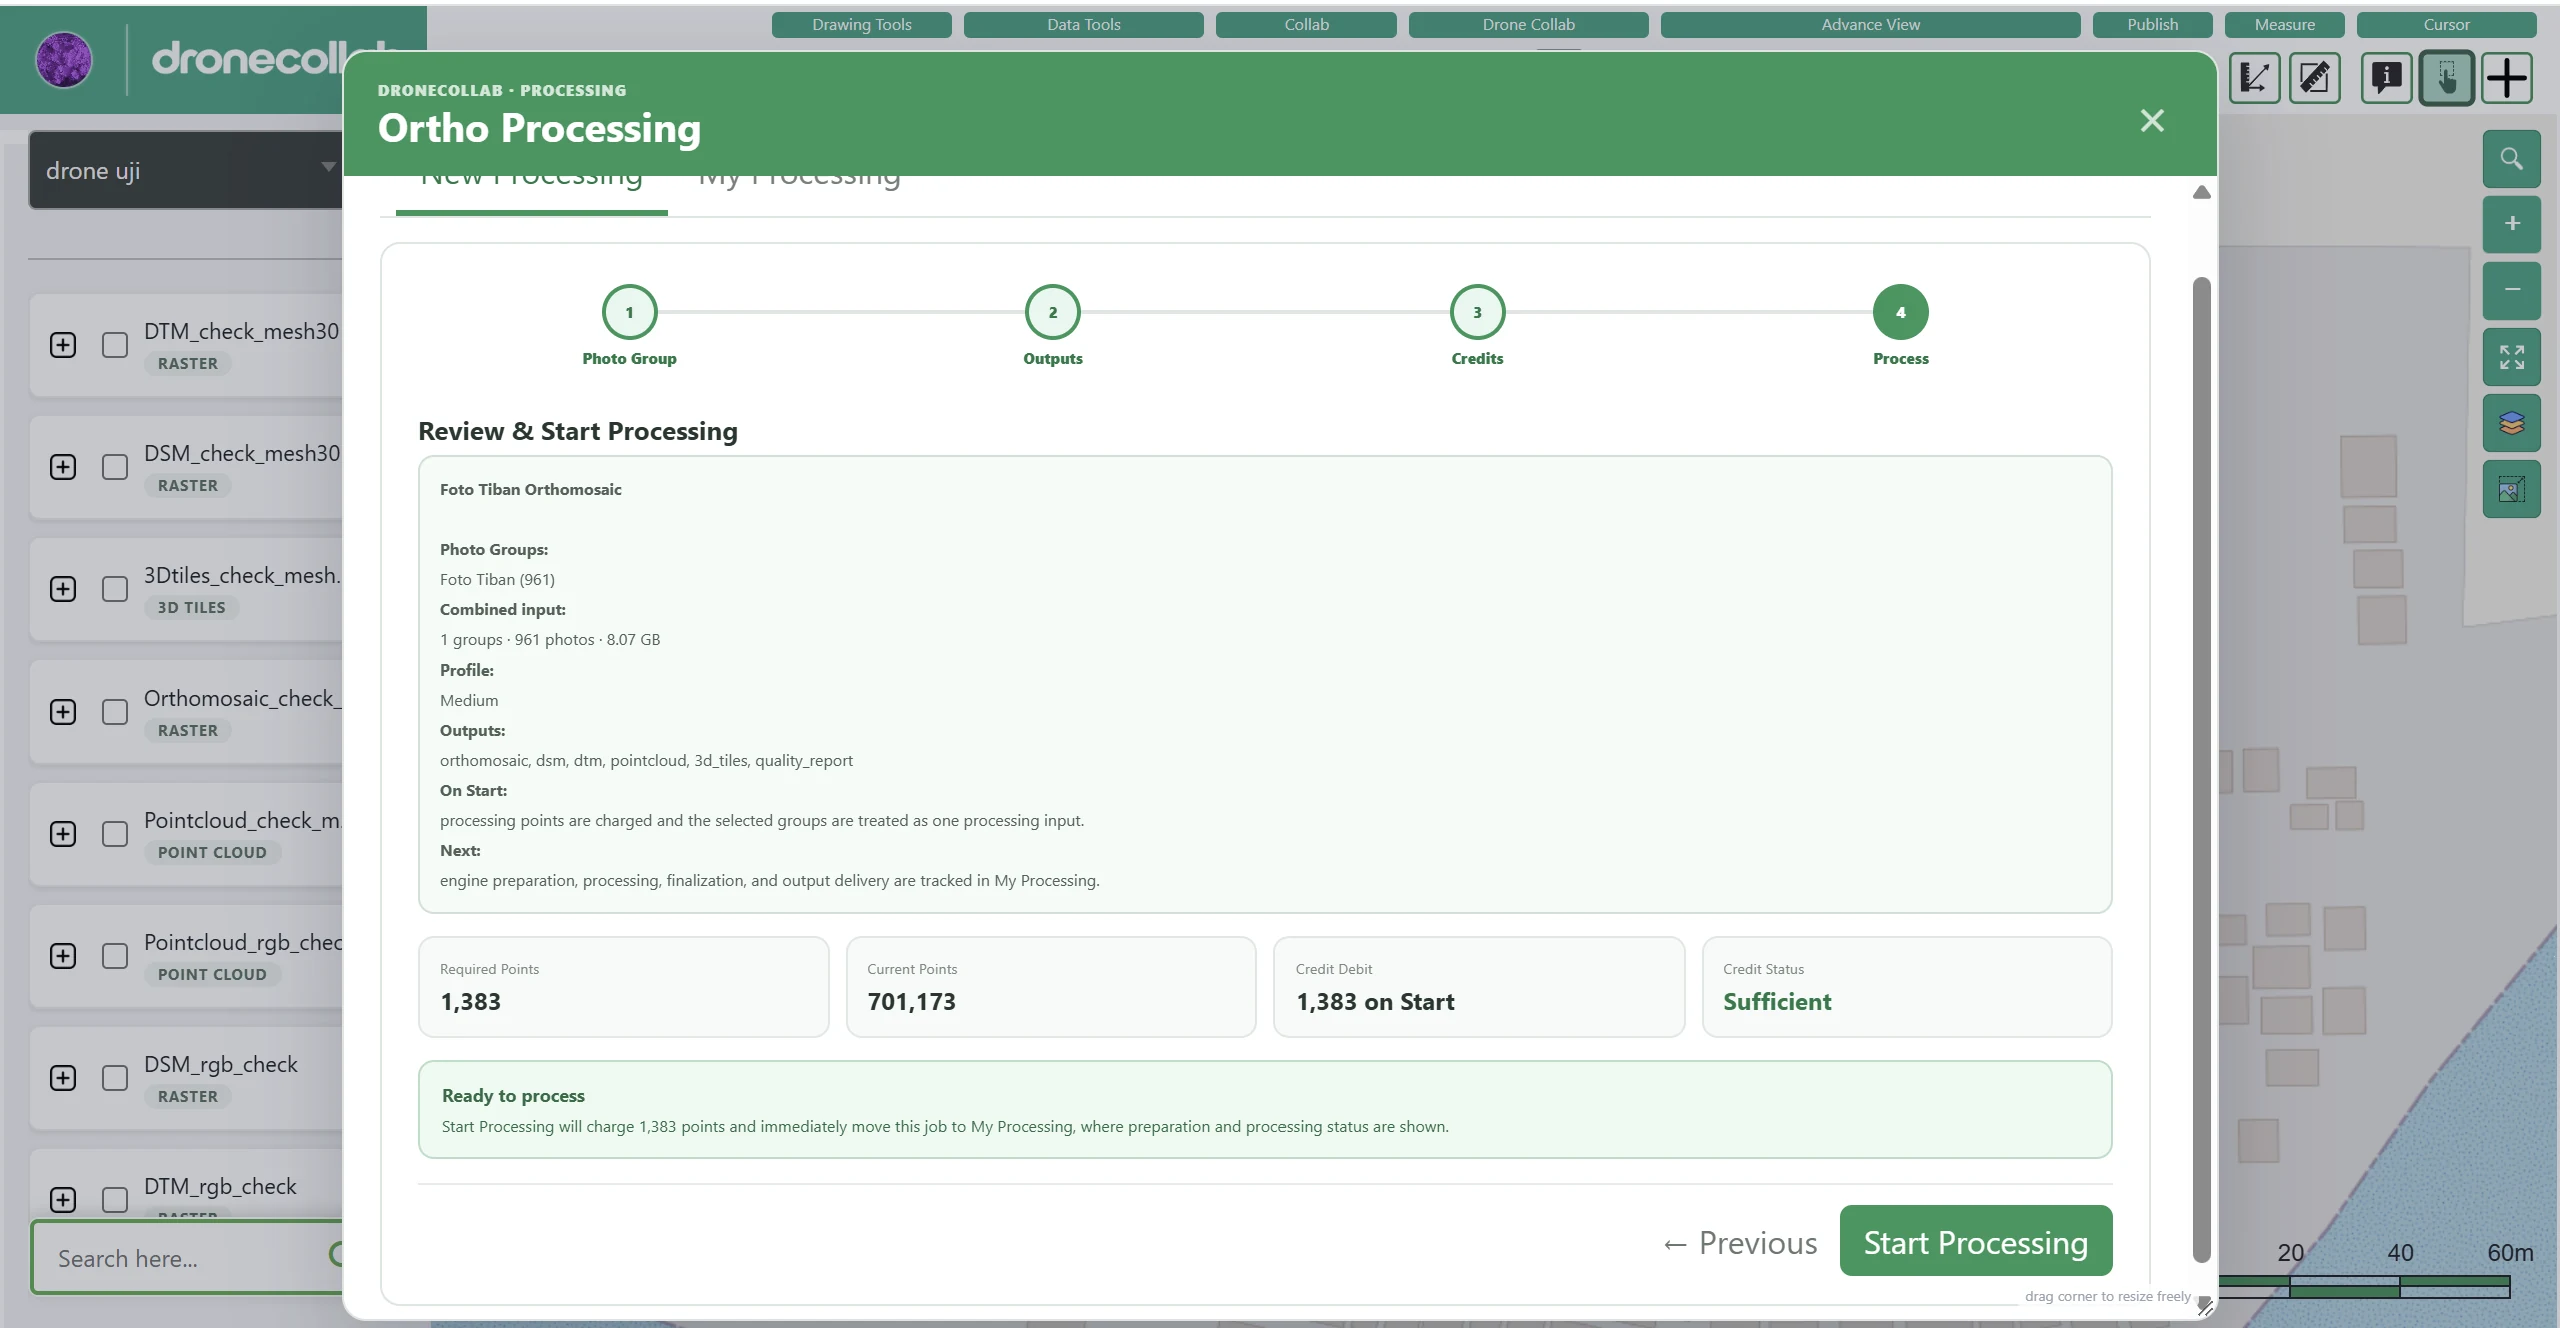
Review and start processing
Review the final job summary before submitting it to the cloud.
What to do
- Verify Photo Groups, Processing Level, selected outputs, and Required Points.
- Confirm that Credit Status reads Sufficient.
- Click Start Processing. Points are charged when the job is accepted.
Application screenshot
Track progress and email
Open My Processing in Ortho Processing to follow the cloud job.
What to do
- The job moves through preparation, processing, and finalization.
- Completion time varies with image quantity, resolution, and settings.
- An email notification is sent to your account after successful completion.
View outputs in Layers
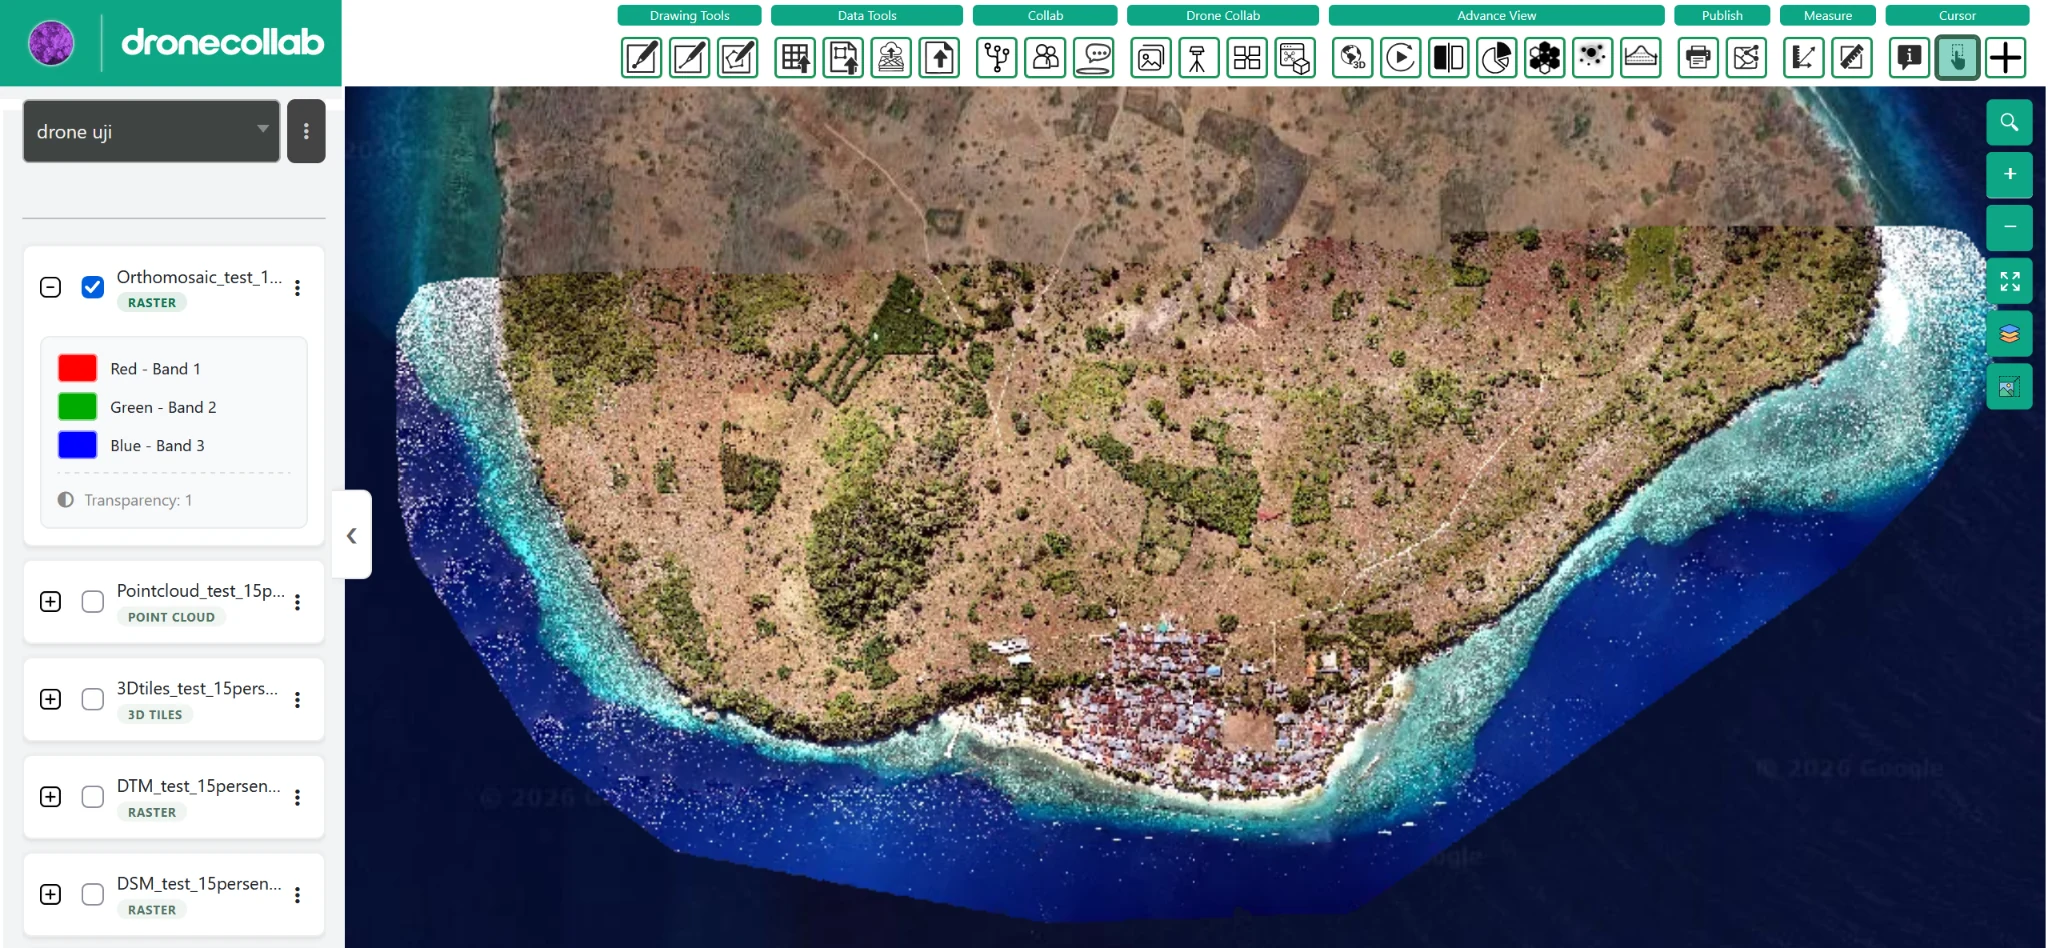
Once processing succeeds, the generated results appear in the project Layers list, as shown in the final example.
What to do
- Find Orthomosaic, Point Cloud, 3D Tiles, DTM, and DSM based on the outputs produced.
- Check a layer to show it on the map; expand its entry for details.
- Inspect the results against your survey location.
Application screenshot
Done! Your results are in Layers.
After successful completion, an email notification is sent and the outputs appear in the project Layers list.
Try it in your DroneCollab account ↗